How to Clean a Sink P-Trap Yourself: Easy Guide
Learn how to clean a sink P-trap yourself like a pro. Follow our step-by-step Fresno plumbing guide to clear clogs and stop unpleasant odors.

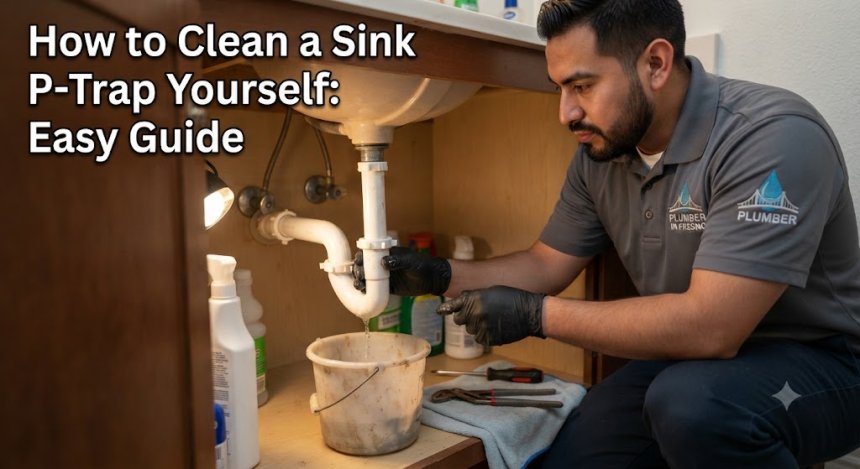
Standing in your kitchen or bathroom, watching soapy water slowly form a stubborn pool instead of disappearing down the drain, is an instant source of daily frustration. When organic waste, soap scum, and hair accumulate in your under-sink drainage architecture, it brings your routine to a grinding halt. Learning how to clean a sink P-trap yourself is a vital, empowering skill that saves you from expensive service calls for minor blockages. In Fresno’s bustling residential neighborhoods, where daily hard water use and organic kitchen waste combine to stress local drain lines, knowing how to safely disassemble and clear your P-trap ensures your home's drainage flows smoothly year-round.
What Is a Sink P-Trap? Decoding the Mechanism
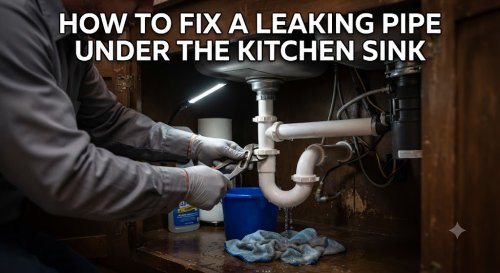
A P-trap is the curved section of plumbing pipe located directly beneath your kitchen or bathroom sink basin. Its distinct U-shape design serves two critical engineering functions: it catches heavy debris, jewelry, or sediment before they travel deeper into narrow home branch lines, and it maintains a standing pool of water that acts as a natural vapor barrier.
This water seal prevents noxious sewer gases, foul odors, and harmful insects from traveling up the pipe and entering your living space. When the trap becomes overly congested with grease, hair, and sludge, water can no longer pass through efficiently. Consider a typical home in Fresno's Tower District: decades of cooking oils mixed with food particles can coat the interior walls of an older tubular brass or modern PVC P-trap, slowing drainage to a crawl.
Root Causes: Why This Problem Occurs in Fresno Homes
Drainage clogs and P-trap restrictions in the Central Valley are driven by a combination of daily usage habits, local water characteristics, and plumbing age.
-
Grease and Soap Scum Accumulation: Pouring cooking fats, oils, and grease down the kitchen sink causes them to cool and solidify against the cold inner walls of the P-trap, trapping subsequent food debris.
-
Hard Water Mineral Bonding: Fresno's mineral-rich water mixes with soap residues to form a dense, calcified sludge that hardens inside tubular fittings and threaded slip joints.
-
Hair and Organic Matting: In bathroom sinks, a combination of shed hair, toothpaste, and skin oils forms dense, fibrous webs that anchor tightly inside the trap curve.
-
Aging Tubular Material Degradation: Older metal P-traps suffer from internal corrosion and pitting, creating rough surfaces that snag debris far more easily than smooth PVC.
-
Improper Venting and Slope: Subtle ground settling or historical installation flaws can compromise branch line slopes, causing water to pool sluggishly and drop suspended solids inside the trap.
Critical Warning Signs: When Your Home is Sounding the Alarm
Drainage assemblies rarely block overnight without giving clear sensory indicators that intervention is required.
-
Auditory Clues: A distinct gurgling or burping sound coming from the drain as air bubbles struggle to escape past a partially blocked P-trap column.
-
Olfactory Indicators: A persistent, musty mildew smell or a faint odor of sulfur and sewer gas wafting up from the basin when the fixture is not in use.
-
Visual Indicators: Slow, sluggish drainage during routine handwashing or dishwashing, standing water pooling in the basin, or minor dampness forming on the floor of the cabinet beneath the sink.
Ignoring these early warnings can lead to a complete structural blockage, overflow risks during heavy fixture use, or sudden joint leaks as pressure builds behind the clog.
Professional Diagnostic & Repair Workflow
When a drainage restriction extends beyond a simple P-trap clog into deep branch lines, a licensed master plumber follows a rigorous, systematic workflow.
-
Step 1: Non-Invasive Triage & Containment: Placing a catch basin beneath the sink cabinet, isolating the work area, and checking surrounding cabinetry for hidden moisture or structural wood rot.
-
Step 2: Precision Camera & Blockage Inspection: Utilizing miniature high-definition drain cameras to inspect downstream sanitary tees and branch lines for secondary obstructions or root intrusions.
-
Step 3: Transparent, Upfront Options: Presenting clear, flat-rate pricing to either clear the local trap, replace aging tubular assemblies, or hydro-jet the main branch line.
-
Step 4: Code-Compliant Remediation: Safely removing the congested P-trap, clearing debris, replacing deteriorated slip-joint washers, and reinstalling components with proper alignment.
-
Step 5: Flow Testing & Leak Verification: Running high-volume water tests to ensure 100% drainage velocity, checking all threaded connections under pressure, and wiping the workspace spotless.
Advanced Diagnostics: The Professional Tool Arsenal
While homeowners can manage basic P-trap cleaning with hand tools, professional technicians deploy specialized gear for deep drainage issues.
-
Push-Rod HD Drain Cameras: Flexible fiber-optic cameras that navigate through tight P-traps and deep wall stacks to locate hidden structural obstructions.
-
Mini-Hydro-Jetting Units: High-pressure water descaling machines that blast away hardened grease, mineral scale, and sludge from the interior walls of drain pipes without damaging PVC or cast iron.
-
Electronic Pipe Locators: Specialized transmitters used to track the exact underground or in-wall path of a clogged drain line from the surface.
-
Adjustable Basin Wrenches: Specialized high-leverage tools designed to loosen stubborn, corroded metal slip nuts located in cramped cabinet spaces.
DIY Reality Check: What You Can Safely Fix vs. When to Step Back
Tackling basic under-sink maintenance can save you time and money, but understanding your limits prevents accidental water damage or structural plumbing failures.
-
Safe DIY Tasks: Placing a bucket underneath the sink, manually unscrewing plastic slip-joint nuts, pulling out and rinsing the P-trap, and replacing worn rubber washers.
-
The Danger Zone: Forcing rusted metal slip nuts on older brass traps with excessive torque, which can twist and fracture thin wall-abuttment pipes.
-
When to Call a Pro: If clearing the P-trap does not resolve the slow drain, indicating a deep clog further down in the wall stack, or if you notice active leaks originating from behind the finished drywall.
Financial Breakdown: Cost Factors & Investment Realities
Understanding the financial variables of drain cleaning and P-trap repairs helps you budget accurately for parts and professional labor.
-
Service Call & Dispatch Fees: Standard dispatch fees covering professional travel, diagnostic assessment, and initial problem isolation.
-
Component Material Quality: Standard PVC tubular replacement kits versus premium brass or designer exposed-trap architectural finishes.
-
Accessibility Challenges: Additional labor required when working inside cramped, custom-built vanity cabinets or around complex built-in water filtration systems.
-
Associated Line Replacements: The potential necessity of replacing rotted tailpieces, deteriorated slip-joint washers, or damaged wall adapters during the service visit.
Unique Expert Insights: Hard Truths Homeowners Learn Too Late
Years of hands-on field experience reveal several common misconceptions and mistakes that property owners make when dealing with slow drains.
-
The Chemical Drain Cleaner Myth: Pouring harsh liquid chemical drain cleaners into a clogged P-trap rarely dissolves dense hair or grease clumps; instead, it corrodes thin metal pipe walls and creates severe splash hazards when opened manually.
-
Overtightening Slip Nuts: Cranking down plastic slip-joint nuts with pliers compresses the internal rubber washer out of shape, causing persistent leaks instead of sealing the joint.
-
Skipping Washer Replacement: Reusing old, flattened rubber slip-joint washers during a P-trap reassembly almost always guarantees a slow cabinet leak.
-
Ignoring Vent Stack Issues: Assuming a slow drain is always a local trap clog when the real culprit is a blocked roof vent stack restricting airflow.
Comprehensive Home Plumbing Maintenance Framework
Keeping your home's drainage infrastructure flowing smoothly requires consistent seasonal attention and smart daily habits.
-
Spring Maintenance: Inspect all under-sink cabinet spaces for early signs of condensation, leaks, or musty odors.
-
Summer Care: Flush kitchen drains with boiling water and baking soda to help break down minor organic grease films during peak usage months.
-
Fall Preparation: Verify that bathroom sink strainers are capturing hair effectively before heavier indoor routines resume in winter.
-
Winter Checks: Check bathroom and kitchen shut-off valves and drain connections for smooth operation during temperature fluctuations.
-
Year-Round Habits: Avoid pouring cooking grease, coffee grounds, and fibrous food waste down sinks, and use mesh drain strainers to catch hair and debris.
Emergency Protocol: When Immediate Dispatch is Non-Negotiable
While a slow-draining sink is typically a manageable nuisance, certain drainage failures require immediate, 24/7 professional intervention.
-
Catastrophic Overflowing Fixtures: If a blocked main drain causes wastewater from other household fixtures to back up into your kitchen or bathroom sink, immediately stop water usage and call an emergency plumber.
-
Unresponsive Branch Line Backups: When clearing the P-trap reveals a dry, clear trap but water still refuses to drain from the wall opening, deep main-line blockage clearing is required.
-
Severe Structural Leaks: If a slip nut or corroded pipe completely snaps off, spraying water inside your cabinetry, immediately shut off the local supply or main water valve.
Frequently Asked Questions (FAQs)
How do I safely remove a sink P-trap myself?
Place a bucket directly beneath the trap to catch standing water. Use your hands or channel-lock pliers to loosen the slip-joint nuts on both ends of the U-shaped pipe, slide the nuts down, pull the trap downward, and empty the contents into the bucket.
Do I need any special tools to clean a P-trap?
For modern PVC P-traps, you generally only need a bucket, a pair of rubber gloves, a rag, and your bare hands. For older metal traps, an adjustable wrench or channel-lock pliers may be required to loosen stuck nuts.
Why is my sink still draining slowly after I cleaned the P-trap?
If the P-trap is completely clean and clear, the obstruction is likely located further down the drainage system in the arm leading into the wall or the main vertical vent stack, which requires professional cabling.
Should I replace the rubber washers when reassembling a P-trap?
Yes, it is always best practice to replace old, compressed rubber slip-joint washers with new ones to ensure a watertight seal and prevent future under-sink leaks.
Can I use chemical drain cleaners before removing a P-trap?
No. Chemical drain cleaners sit inside the P-trap and can splash onto your skin or eyes when you unscrew the fittings. Always clear a physical trap manually rather than relying on harsh chemicals.
How often should a sink P-trap be cleaned?
Most P-traps do not require scheduled removal unless they become clogged or start emitting odors. Using drain strainers and flushing lines with hot water periodically minimizes the need for frequent cleanings.
How long does it take a professional to clean or replace a P-trap?
An experienced plumber can typically remove, clean, and reinstall a standard sink P-trap within 15 to 30 minutes.